After you activate AvaTax and set up your company profile, install and configure AvaTax for your accounting software.
During configuration, customize your setup to fit your unique business needs for things like:
- Tax Calculation Settings for various tax types.
- Exemption Settings for exempt customers
- Product taxability settings
Downloading Avatax

To connect your accounting software to AvaTax, download your integration software.
- Download and Install the Avatax Connector directly from the DSD Enhancements Marketplace.
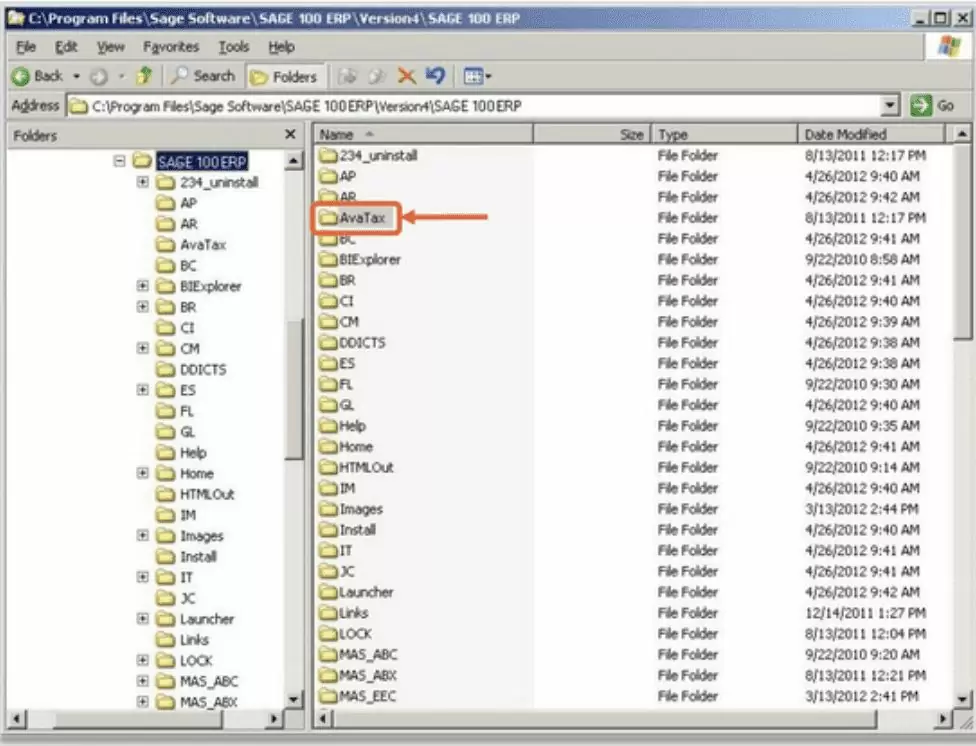
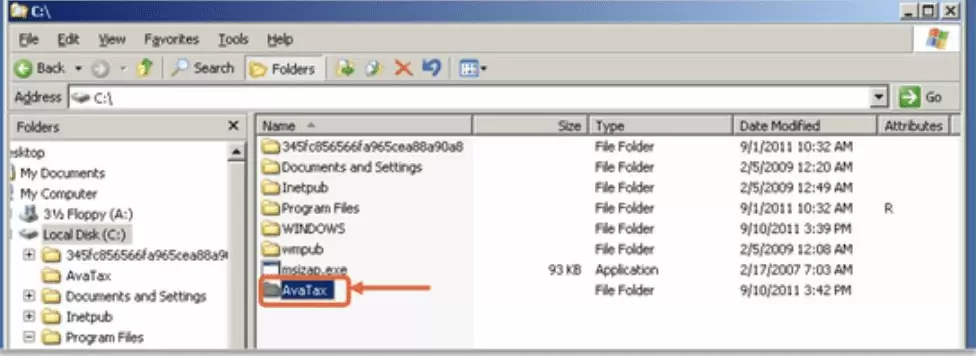
Manually Registering the File:
- Locate and copy the AvaTax folder in the Sage 100 folder.

2. Copy the folder to the root-level of the drive on each workstation.
3. Open the AvaTax folder on each workstation, and then double-click register_for_com.bat.

Configure AvaTax for Your Accounting Software
- To configure AvaTax connect options:
On the Tasks tab, go to Sage 100 > Modules > Library Master > Setup, and then click AvaTax Configuration. If you receive the error message “You are not authorized to access this program,” follow these steps:
- Go to Library Master > Main > Role Maintenance.
- Select the administrative role you’re logged in as, and then add access to the Avalara tasks under Library Master > Reports/Forms and Library Master > Setup Options.
- Select the AvaTax Connect Options, and then click Accept.
2. In the AvaTax Configuration dialog box, complete the following steps:
Field
- Account Number
- License Key
Action
Use the information provided in an email from Avalara (sent to the email account you used to activate your account). It must match what’s saved in AvaTax.
URL
Enter https://developer.avalara.com/ if you have an AvaTax development account or https://account.avalara.com/ if you have an AvaTax production account.
Tax Schedule
Select AVATAX to use AvaTax to perform tax calculation for your customers.
Freight Code
The default shipping code when you enter a shipping charge on a sales document.
Validate Addresses into UPPERCASE
Optional: Select to save all address validation results in uppercase format.
Skip Tax Calculation for V/I Imports
Optional: Select to make AvaTax ignore transactions imported through the Visual Integrator jobs.
Enable Ship-To By Sales Order
Optional: Select to enable tax calculation based on the ship-to address at the line level of the transaction.
Enable A/R Ship-To Addresses
Optional: Select to enable selection of ship-to address on an A/R invoice.
Company Address
Enter your company address, and then click the Avalara button to validate your address to ensure accurate tax calculation.
Whse
Optional: Click to add and validate your warehouse address.
3. From the server and each workstation, click the AvaTax button, and then click Accept.


